


Hey there! If you're looking to spruce up your ceiling with some cool aluminum lights, you've come to the right place. I'm an aluminum light supplier, and I'm gonna walk you through the process of installing aluminum lights on a ceiling step by step. It's not as hard as you might think, and you'll be enjoying that fresh, modern lighting in no time.
What You'll Need
First things first, gather all the tools and materials you'll need for this project. You won't need a whole bunch of fancy stuff, but it's important to have everything within reach before you start. Here's a quick list:
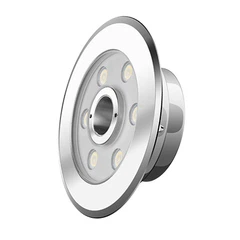
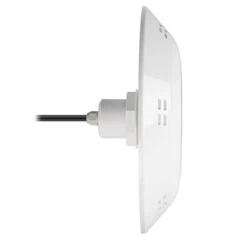
- Aluminum lights (obviously). You can check out our ac100 240v lighting aluminum options. They're solid, durable, and come in different styles to fit your taste.
- A drill with appropriate drill bits
- Screwdriver set (both flathead and Phillips, just in case)
- Wire cutters and strippers
- Electrical tape
- Ladder or step stool
- Pencil for marking
- Ceiling anchors if you have a hollow ceiling
Preparation
Before you start drilling holes in your ceiling, take some time to plan out where you want your lights to go. Think about the layout and how the light will spread across the room. You don't want any dark spots, right?
Measure the distance between the mounting points on your lights. Then, use a pencil to mark these points on the ceiling. Make sure your marks are level and evenly spaced. If you're installing multiple lights, it's a good idea to use a level to keep everything straight.
Safety First
Working with electrical stuff can be dangerous, so don't skip the safety precautions. Turn off the power at the circuit breaker that controls the area where you'll be installing the lights. Double-check by using a voltage tester to make sure there's no electricity flowing to the wires.
Wear safety goggles and gloves to protect yourself from any debris or sharp edges. And if you're using a ladder, make sure it's on a stable surface and someone can hold it for you if possible.
Mounting the Bracket
In most cases, aluminum lights come with a mounting bracket. Start by attaching this bracket to the ceiling using the appropriate screws. If you have a drywall ceiling, you might need to use ceiling anchors for extra support. Just drill a small hole where you marked, insert the anchor, and then screw the bracket into place.
Make sure the bracket is securely fastened and level. You can use a level to double-check. If the bracket isn't level, your light will look wonky and might not work as well.
Wiring the Light
Now comes the electrical part. If you're not confident working with electricity, it's a good idea to call in a professional. But if you're feeling brave, here's how it's done.
First, carefully remove the wiring cover on the light fixture. You'll see a set of wires inside. Most likely, you'll have a black wire (hot), a white wire (neutral), and a green or bare copper wire (ground).
Match the wires in the light fixture with the wires in the ceiling. Connect the black wires together, the white wires together, and the ground wires together. You can use wire nuts to secure the connections. Make sure the wire nuts are tightened properly so there's no loose wiring.
Once the wires are connected, wrap each connection with electrical tape for an extra layer of protection. Carefully tuck the wires back into the ceiling box and attach the light fixture to the mounting bracket using the provided screws.
Testing the Light
Before you completely close up the fixture, turn the power back on at the circuit breaker. Flip the light switch to see if your newly installed aluminum light works. If it doesn't, turn the power off again and double-check your wiring connections.
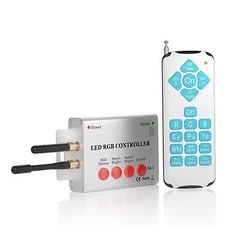
If you're experiencing issues like Led Pool Light Flashing, there might be a problem with the wiring or the light itself. Check the connections and make sure everything is tight. If the problem persists, you might need to contact a professional for further assistance.
Final Touches
Once you're satisfied that the light is working properly, turn the power off again and finish installing any covers or decorative elements that came with your light fixture. Make sure everything is securely in place and looks nice.
Maintenance
Aluminum lights are relatively low-maintenance, but it's still a good idea to keep an eye on them. Check the wiring connections periodically to make sure they're still tight. If you notice any signs of damage or wear, replace the parts as needed.


Conclusion
Installing aluminum lights on a ceiling is a great way to add a modern touch to your space. With a little bit of planning and the right tools, you can do it yourself. Remember to take your time, follow safety precautions, and don't hesitate to ask for help if you need it.
If you're interested in purchasing high-quality aluminum lights, we've got you covered. We offer a wide range of ac100 240v pool lights waterproof and other lighting options that are perfect for any room. If you have any questions or want to discuss your lighting needs, feel free to reach out to us. We're here to help you light up your world!
References
- DIY Home Improvement Guidebooks
- Electrical Installation Manuals