


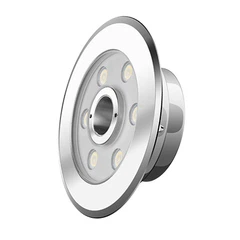


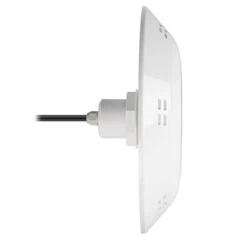


Installing recessed ground lights in a sloped area can be a challenging yet rewarding project. As a supplier of recessed ground lights, I've witnessed firsthand the transformative power these lights can bring to a landscape, especially on slopes. In this blog, I'll guide you through the process of installing recessed ground lights in a sloped area, sharing tips and best practices along the way.
Understanding the Challenges of Sloped Areas
Before diving into the installation process, it's important to understand the unique challenges that sloped areas present. One of the primary challenges is ensuring proper drainage. Water tends to flow more rapidly on slopes, which can lead to water pooling around the lights if not addressed properly. This can cause damage to the lights and their wiring over time.
Another challenge is maintaining a level installation surface. Recessed ground lights are designed to be installed flush with the ground, and achieving this on a slope can be tricky. Uneven installation can not only affect the appearance of the lights but also their functionality.
Planning Your Installation
The first step in any lighting installation project is planning. This involves determining the layout of your lights, the type of lights you need, and the power source.
Layout
When planning the layout of your recessed ground lights on a slope, consider the following factors:
- Safety: Ensure that the lights are placed in areas where they will not pose a tripping hazard. This may mean avoiding areas with high foot traffic or placing the lights in a way that they are less likely to be stepped on.
- Aesthetics: Think about how the lights will enhance the beauty of your landscape. Consider the natural contours of the slope and use the lights to highlight specific features, such as trees, shrubs, or architectural elements.
- Functionality: Determine the purpose of the lights. Are they for safety, security, or decoration? This will help you decide on the appropriate spacing and intensity of the lights.
Type of Lights
There are several types of recessed ground lights available on the market, each with its own unique features and benefits. When choosing lights for a sloped area, look for lights that are:
- Waterproof: Since water is more likely to accumulate on slopes, it's important to choose lights that are waterproof to prevent damage.
- Durable: Sloped areas can be subject to more wear and tear, so choose lights that are made from high-quality materials and are built to last.
- Adjustable: Adjustable lights allow you to direct the light where it's needed most, making them ideal for highlighting specific features on a slope.
You can explore our range of Outside Ground Lights, Outdoor Ground Garden Lights, and Ground Level Landscape Lighting to find the perfect lights for your project.
Power Source
There are two main types of power sources for recessed ground lights: hardwired and solar.
- Hardwired: Hardwired lights are connected directly to your home's electrical system. This provides a reliable and consistent power source but requires professional installation.
- Solar: Solar lights are powered by the sun and are a more environmentally friendly option. They are easy to install and do not require any wiring, but their performance may be affected by weather conditions.
Preparing the Installation Site
Once you have planned your installation, it's time to prepare the installation site. This involves clearing the area, marking the locations of the lights, and digging the holes.
Clearing the Area
Remove any debris, rocks, or vegetation from the installation site. This will make it easier to dig the holes and ensure a level installation surface.
Marking the Locations
Use stakes and string to mark the locations of the lights. Make sure the lights are evenly spaced and aligned with your planned layout.
Digging the Holes
Dig the holes for the lights using a shovel or a post hole digger. The depth and diameter of the holes will depend on the size of the lights you are using. Make sure the holes are deep enough to accommodate the lights and provide enough space for proper drainage.
Installing the Lights
Once the holes are dug, it's time to install the lights. Follow these steps for a successful installation:
Place the Lights in the Holes
Carefully place the lights in the holes, making sure they are level and flush with the ground. Use a level to check the alignment of the lights.
Connect the Wiring
If you are using hardwired lights, connect the wiring according to the manufacturer's instructions. Make sure the connections are secure and protected from water.
Backfill the Holes
Backfill the holes with gravel or crushed stone to provide proper drainage. Make sure the gravel is packed tightly around the lights to prevent them from shifting.
Test the Lights
Before covering the lights with soil, test them to make sure they are working properly. This will allow you to make any necessary adjustments before the installation is complete.


Cover the Lights with Soil
Once the lights are tested and working properly, cover them with soil. Make sure the soil is level and does not cover the lens of the lights.
Maintaining the Lights
Proper maintenance is essential to ensure the longevity and performance of your recessed ground lights. Follow these tips for maintaining your lights:
- Clean the Lights Regularly: Use a soft cloth or a brush to clean the lens of the lights. This will remove any dirt, debris, or insects that may accumulate on the lens and affect the light output.
- Check the Wiring: Periodically check the wiring for any signs of damage or wear. If you notice any issues, contact a professional electrician to make the necessary repairs.
- Replace the Bulbs as Needed: If a bulb burns out, replace it with a new one as soon as possible. This will ensure that the lights continue to provide adequate illumination.
Conclusion
Installing recessed ground lights in a sloped area can be a challenging but rewarding project. By following the steps outlined in this blog, you can ensure a successful installation and enhance the beauty and safety of your landscape.
If you have any questions or need further assistance with your recessed ground light installation, please don't hesitate to contact us. We are a leading supplier of recessed ground lights and are committed to providing our customers with the highest quality products and services. Whether you are a homeowner, a landscape designer, or a contractor, we can help you find the perfect lights for your project.
Let's work together to create a stunning outdoor lighting design that will transform your sloped area into a beautiful and inviting space. Contact us today to start the conversation!
References
- [LED Lighting Handbook](Author, Year of Publication)
- [Landscape Lighting Design Guide](Author, Year of Publication)