


As a dedicated supplier of Outdoor Wall Washers, I often encounter inquiries from customers regarding various aspects of these lighting fixtures. One question that frequently surfaces is, "Is it difficult to replace bulbs in Outdoor Wall Washers?" In this blog post, I'll delve into this topic, providing insights based on my experience in the industry.
Understanding Outdoor Wall Washers
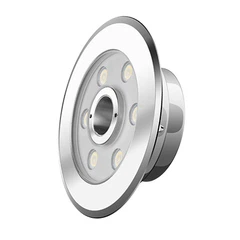
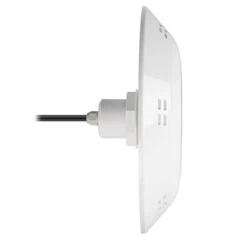
Before we discuss bulb replacement, it's essential to understand what Outdoor Wall Washers are. An Outdoor Wall Washer is a lighting fixture designed to illuminate large vertical surfaces, such as building facades, walls, and monuments. These fixtures are typically installed outdoors, which means they need to be durable and weather - resistant.
LED Wall Washers have become increasingly popular in recent years due to their energy efficiency, long lifespan, and ability to produce high - quality light. What Is A LED Wall Washer Light offers a detailed explanation of how these lights work and their various applications.
Factors Affecting Bulb Replacement Difficulty
Several factors can influence the difficulty of replacing bulbs in Outdoor Wall Washers.
1. Design of the Wall Washer
The design of the Wall Washer plays a crucial role. Some Wall Washers are designed with easy - access panels or compartments that allow for straightforward bulb replacement. For example, our Wallwasher Led 100cm models are engineered with user - friendly designs. They feature removable covers that can be easily opened with a few simple steps, providing quick access to the bulbs.
On the other hand, some older or more complex designs may have bulbs that are deeply embedded within the fixture. In such cases, replacing the bulbs may require the removal of multiple components, which can be time - consuming and may require specialized tools.


2. Mounting Location
The location where the Wall Washer is mounted also affects the difficulty of bulb replacement. If the Wall Washer is installed at a low height and is easily accessible, replacing the bulbs is relatively simple. However, if it is mounted on a tall building or in a hard - to - reach area, such as on a bridge or a high - rise facade, special equipment like scaffolding or cherry pickers may be required. This not only adds to the complexity of the replacement process but also increases the cost and safety risks.
3. Weather Resistance Features
Outdoor Wall Washers are designed to withstand harsh weather conditions. While this is a great advantage, it can also make bulb replacement more challenging. Many Wall Washers are sealed to prevent water and dust ingress, which means that opening the fixture to replace the bulbs may require breaking the seal. After replacing the bulbs, the seal needs to be re - established properly to maintain the weather resistance of the fixture.
Steps for Bulb Replacement
If you've determined that the bulb in your Outdoor Wall Washer needs to be replaced, here are the general steps you can follow:
Step 1: Safety First
Before starting any work on the Wall Washer, ensure that the power supply is turned off. This will prevent the risk of electric shock. If the Wall Washer is mounted in a high or hard - to - reach area, use appropriate safety equipment, such as harnesses and safety goggles.
Step 2: Access the Bulb
Depending on the design of the Wall Washer, remove any covers or panels that provide access to the bulbs. Some Wall Washers may have screws or clips that need to be loosened, while others may have snap - on covers.
Step 3: Remove the Old Bulb
Once you have access to the bulb, carefully remove it from its socket. Be gentle to avoid damaging the socket or other components of the Wall Washer.
Step 4: Install the New Bulb
Insert the new bulb into the socket, making sure it is properly seated. Follow the manufacturer's instructions regarding the correct orientation and installation method.
Step 5: Re - assemble the Wall Washer
After installing the new bulb, replace the covers or panels and secure them in place. If the Wall Washer has a seal, ensure that it is properly re - established to maintain weather resistance.
Step 6: Test the Wall Washer
Turn the power supply back on and test the Wall Washer to ensure that the new bulb is working correctly.
Tips for Easy Bulb Replacement
- Keep Spare Bulbs on Hand: Having spare bulbs readily available can save you time and hassle when a bulb burns out.
- Follow the Manufacturer's Instructions: Always refer to the manufacturer's manual for specific instructions on bulb replacement. This will help you avoid making mistakes and ensure that the replacement is done correctly.
- Regular Maintenance: Regularly inspect your Wall Washers for signs of damage or wear. This can help you identify potential problems early and prevent more significant issues down the line.
Conclusion
In conclusion, whether it is difficult to replace bulbs in Outdoor Wall Washers depends on several factors, including the design of the Wall Washer, its mounting location, and its weather resistance features. While some Wall Washers are designed for easy bulb replacement, others may require more effort and specialized equipment.
As a supplier of Outdoor Wall Washers, we are committed to providing high - quality products that are both easy to install and maintain. Our team of experts is always available to assist you with any questions or concerns you may have regarding bulb replacement or other aspects of our Wall Washers.
If you are interested in purchasing Outdoor Wall Washers or have any questions about our products, we encourage you to contact us for a detailed discussion. Our experienced sales team will be happy to provide you with more information and help you find the right Wall Washers for your specific needs.
References
- Industry standards for Outdoor Wall Washers
- Manufacturer's manuals for various Wall Washer models