


Installing LED spike lights on a slope can be a challenging yet rewarding endeavor. As a supplier of high - quality LED spike lights, I've encountered numerous inquiries regarding the feasibility and best practices of this installation. In this blog, I'll delve into the technical aspects, potential challenges, and benefits of installing LED spike lights on slopes.
Technical Considerations
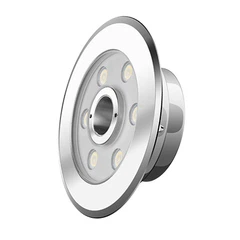
Before proceeding with the installation, it's crucial to understand the technical requirements of LED spike lights. Our Spike Lights are designed to operate efficiently under various conditions. They come in different power ratings and color temperatures, allowing you to choose the most suitable option for your slope lighting project.
The DV24V LED Spike is a popular choice due to its low - voltage operation, which is not only energy - efficient but also safer, especially in outdoor settings. The 24V power supply reduces the risk of electrical hazards, making it ideal for areas that may be exposed to moisture or water runoff on slopes.

When it comes to the installation on a slope, the angle of the slope is a key factor. Most LED spike lights are designed to be installed vertically, but on a slope, this may not be possible. The slope angle can affect the light distribution. For example, if the slope is too steep, the light may be directed more towards the ground or into the air, rather than providing the desired illumination along the path or area. To address this, some of our dc24v ground spike lights are adjustable, allowing you to tilt the light head to achieve the optimal lighting angle.
Challenges of Slope Installation
One of the primary challenges of installing LED spike lights on a slope is ensuring proper stability. The ground on a slope is often more prone to erosion and movement, which can cause the spike lights to become loose or even fall over. To overcome this, we recommend using a more robust installation method. For instance, you can dig a deeper hole than usual for the spike and use a mixture of gravel and soil to backfill it. This provides better support for the spike and helps prevent it from being dislodged by natural forces such as rain or wind.
Another challenge is the drainage. Water tends to flow more rapidly on slopes, and if the spike lights are not properly protected, they can be damaged by water infiltration. Our LED spike lights are designed with waterproofing features, but additional precautions may be necessary. You can create a small drainage channel around the base of the spike lights to direct water away, reducing the risk of water damage.
Benefits of Slope Lighting
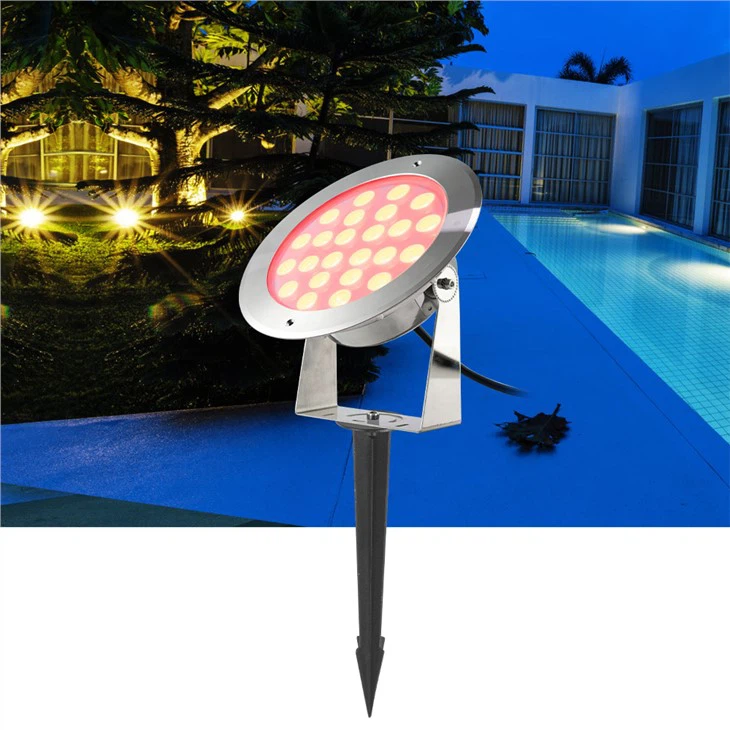
Despite the challenges, there are significant benefits to installing LED spike lights on slopes. Firstly, they enhance safety. Slopes can be hazardous, especially at night, as it's easy to trip or lose balance. The illumination provided by the spike lights makes it easier for people to navigate the slope safely.
Secondly, slope lighting adds aesthetic appeal to your outdoor space. The soft glow of the LED lights can create a beautiful and inviting atmosphere, highlighting the natural beauty of the slope and any landscaping features. It can transform a dull and potentially dangerous slope into an attractive and functional part of your property.
Installation Steps
If you've decided to install LED spike lights on a slope, here are the general steps to follow:
- Plan the Layout: Determine the areas that need to be illuminated. Consider the slope angle, the path of pedestrian traffic, and any existing landscaping features. Mark the locations where you want to install the spike lights.
- Prepare the Ground: Dig holes at the marked locations. As mentioned earlier, the holes should be deeper than normal to ensure stability. Mix gravel and soil in a ratio of about 1:3 to use as backfill.
- Install the Spike Lights: Carefully insert the spike lights into the holes. If the lights are adjustable, set the light head to the desired angle.
- Connect the Wiring: Follow the manufacturer's instructions to connect the wiring. Make sure all connections are secure and waterproofed.
- Test the Lights: Before backfilling the holes completely, test the lights to ensure they are working properly.
- Backfill the Holes: Once the lights are working, backfill the holes with the gravel - soil mixture. Compact the soil gently around the base of the spike lights to provide additional support.
Maintenance
Regular maintenance is essential to ensure the longevity and optimal performance of your LED spike lights on the slope. Check the lights periodically for any signs of damage, such as loose spikes, cracked lenses, or water infiltration. Clean the lenses regularly to remove dirt and debris, which can reduce the light output.
If you notice any issues with the lights, such as flickering or dimming, it may be a sign of a wiring problem or a faulty light unit. In such cases, it's advisable to contact a professional electrician or reach out to us as your LED spike light supplier for assistance.
Contact for Purchase and Consultation
If you're interested in purchasing our high - quality LED spike lights for your slope lighting project, or if you have any questions or need further advice, we're here to help. We have a team of experts who can provide you with detailed information about our products, assist with installation planning, and offer solutions to any challenges you may face. Don't hesitate to get in touch with us to start transforming your slope into a safe and beautiful outdoor space.
References
- "Outdoor Lighting Handbook" - A comprehensive guide on outdoor lighting installations, including slope lighting.
- Manufacturer's specifications for our LED spike lights, which provide detailed technical information and installation guidelines.