


As a seasoned supplier in the pool lighting industry, I often receive inquiries from pool owners and installers about various aspects of pool lighting, including the installation of pool light gaskets. In this blog post, I'll guide you through the process of installing a pool light gasket, sharing insights based on my years of experience in providing high - quality pool lighting solutions.
Understanding the Importance of Pool Light Gaskets
Before we dive into the installation process, it's crucial to understand why pool light gaskets are so important. Pool light gaskets act as a seal between the light fixture and the pool wall or niche. They prevent water from seeping into the electrical components of the light, which could lead to short - circuits, corrosion, and potential safety hazards. A properly installed gasket ensures the longevity and safety of your pool lighting system.
Tools and Materials You'll Need
To install a pool light gasket, you'll need the following tools and materials:
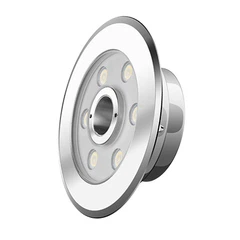
- Replacement Gasket: Make sure you select a gasket that is compatible with your specific pool light model. Different lights may have different sizes and shapes of gaskets. You can find a wide range of compatible gaskets in our pool lighting catalog.
- Screwdriver: Depending on your pool light, you may need a flat - head or Phillips - head screwdriver to remove and reinstall the light fixture.
- Cleaning Supplies: A mild detergent and a soft cloth or sponge to clean the light niche and the gasket surface. This helps to ensure a proper seal.
- Silicone Lubricant: This can be used to ease the installation process and improve the seal of the gasket.
Step - by - Step Installation Guide
Step 1: Turn Off the Power
Safety should always be your top priority. Before you start working on the pool light, turn off the power supply to the pool lighting system at the breaker box. This will prevent any risk of electric shock.

Step 2: Remove the Light Fixture
Use your screwdriver to remove the screws holding the light fixture in place. Carefully lift the light out of the niche. Be gentle as you don't want to damage the wiring or the light itself. Place the light on a clean, dry surface.
Step 3: Clean the Niche and Gasket Surface
Take your mild detergent and soft cloth or sponge to clean the inside of the light niche. Remove any dirt, debris, or old gasket material. Also, clean the surface of the light fixture where the gasket will be placed. A clean surface is essential for a good seal. You can refer to [The Characteristics Of Swimming Pool Lights](/pool - lighting/the - characteristics - of - swimming - pool - lights.html) to understand more about the components of pool lights and their maintenance.
Step 4: Prepare the New Gasket
If your new gasket has a lubricant coating, it's ready to be installed. If not, apply a thin layer of silicone lubricant to both sides of the gasket. This will make it easier to position and will also enhance the sealing properties.
Step 5: Install the Gasket
Carefully place the gasket around the edge of the light fixture. Make sure it fits snugly and evenly. Check for any gaps or wrinkles in the gasket. If you find any, adjust the gasket until it is properly seated.
Step 6: Reinstall the Light Fixture
Lower the light fixture, with the gasket in place, back into the niche. Align the holes in the light fixture with the holes in the niche. Insert the screws and tighten them, but be careful not to overtighten as this could damage the gasket or the light fixture.
Step 7: Test the Installation
Once the light fixture is reinstalled, turn the power back on at the breaker box. Check if the light comes on. Then, observe the area around the light for any signs of water leakage. If you notice any leaks, turn off the power again and re - check the gasket installation.
Troubleshooting Common Issues
- Gasket Won't Fit Properly: Double - check that you have the correct gasket for your light model. If it's still too loose or too tight, contact our customer support team. We can assist you in finding the right replacement.
- Leakage After Installation: This could be due to an improper seal. Check if the gasket is evenly seated and there are no gaps. You may need to remove the light fixture again, re - lubricate the gasket, and reinstall it. For more in - depth knowledge about pool light performance and potential issues, you can read [When Designing Swimming Pool Lighting, What Should Be Considered When Choosing Lamps?](/pool - lighting/when - designing - swimming - pool - lighting - what.html).
The Significance of Quality Gaskets
When it comes to pool light gaskets, quality matters. High - quality gaskets are made from durable materials that can withstand the harsh pool environment, including exposure to chemicals, sunlight, and water. They are more likely to provide a long - lasting and reliable seal. At our company, we only offer gaskets that meet strict quality standards. You can learn more about the importance of quality components in pool lights from [The Significance Of IP68 Certification For Swimming Pool Lights](/pool - lighting/the - significance - of - ip68 - certification - for.html).
Conclusion
Installing a pool light gasket is a relatively straightforward process if you follow the steps carefully. By ensuring a proper installation, you can enhance the safety and performance of your pool lighting system. If you have any questions or need further assistance, our team of experts is always here to help.
Whether you're a pool owner looking to replace a worn - out gasket or a professional installer in need of high - quality pool lighting products, we are your go - to supplier. Our extensive range of pool lights and accessories, including gaskets, is designed to meet the diverse needs of our customers.
If you're interested in purchasing pool lighting products or need more information about our offerings, we encourage you to reach out to us. We're eager to discuss your requirements and help you find the perfect solutions for your pool lighting needs.
References
- General knowledge and experience in the pool lighting industry.
- Product manuals and specifications from pool light manufacturers.