


Hey there pool owners! If you've got a fiberglass pool and you're looking to add some pizzazz, installing LED lights is a game - changer. As a Swimming Pool LED supplier, I've seen firsthand how these lights can transform a regular pool into a spectacular oasis, whether it's for a relaxing evening swim or a fun pool party.
Why Choose LED Lights for Your Fiberglass Pool
Let's start by talking about why LED lights are so awesome for fiberglass pools. First off, they're energy - efficient. Compared to traditional pool lights, LEDs use way less power, which means lower electricity bills for you. Plus, they last a heck of a lot longer. You won't have to keep replacing bulbs every few months. We're talking about years of reliable use.
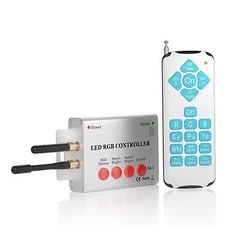
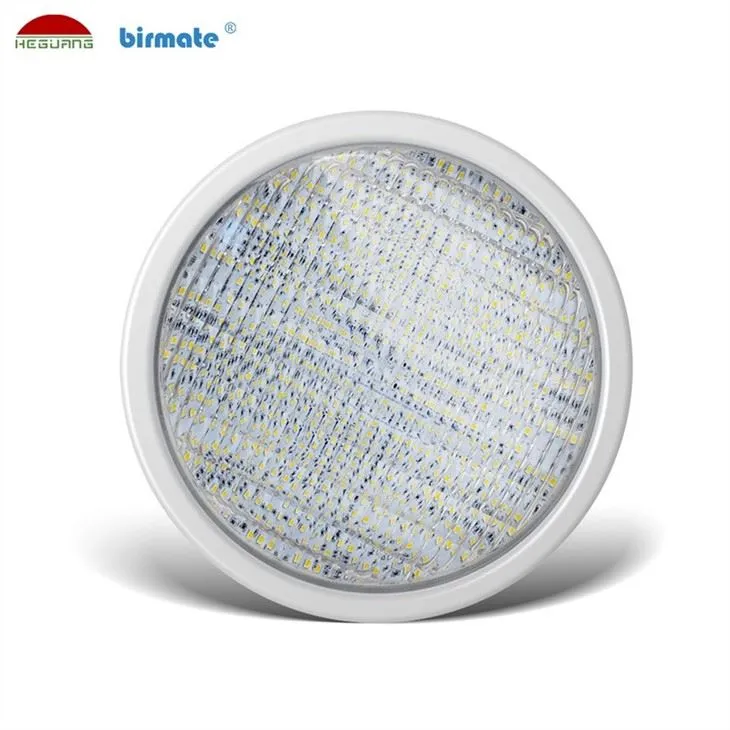
LED lights also come in a huge range of colors. You can have a soft white light for a calm, relaxing vibe, or go all out with Swimming Pool Rgb Lights that let you cycle through a rainbow of colors at the touch of a button. It's like having your own private light show in your pool.
Another great thing about LED lights is that they produce very little heat. This is super important for fiberglass pools because too much heat can damage the fiberglass finish over time. With LED lights, you don't have to worry about that.
What You'll Need
Before you start the installation process, you need to gather a few tools. Here's a basic list:
- Drill: You'll need a good quality drill to make holes in the fiberglass for the light housing.
- Screwdriver: To attach the light fixture and any mounting brackets.
- Wire strippers: For connecting the electrical wires.
- Waterproof silicone sealant: To keep water out of the light assembly and prevent leaks.
- Measuring tape: To get accurate measurements for placement.
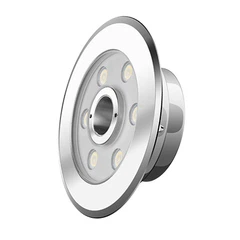
- Of course, you'll also need the Inground Buried Embedded Swimming Pool Light itself.
Step - by - Step Installation Guide
Step 1: Plan the Placement
The first step is to decide where you want to install the lights. It's a good idea to place the lights around the perimeter of the pool, about every 8 - 10 feet. This will give you even lighting throughout the pool. Make sure you measure carefully and mark the spots where you'll be drilling the holes. You don't want to end up with a light that's crooked or in the wrong place.
Step 2: Drill the Holes
Once you've marked the spots, it's time to drill the holes. Start with a small drill bit to make a pilot hole, and then gradually increase the size to fit the light housing. Be really careful when drilling into the fiberglass. Go slow and steady, and use a lot of water to cool down the drill bit and prevent it from cracking the fiberglass.
Step 3: Install the Light Housing
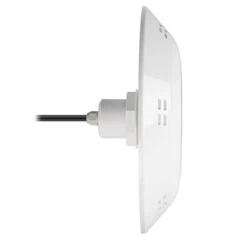
After you've drilled the holes, clean out any debris from the holes. Then, apply a generous amount of waterproof silicone sealant around the edges of the light housing. Carefully insert the housing into the hole and press it firmly so that it's flush with the fiberglass surface. Use a screwdriver to attach the mounting brackets or screws to secure the housing in place.

Step 4: Connect the Wires
This is the electrical part, so if you're not comfortable working with electricity, it's a good idea to call in a professional. First, strip the ends of the wires coming from the light fixture. Then, connect them to the electrical wires in the pool's wiring system. Make sure you match the colors correctly (usually black to black, white to white, and green to green). Use wire nuts to secure the connections and wrap them with electrical tape to make sure they're waterproof.
Step 5: Test the Lights
Before you completely seal everything up, it's a good idea to test the lights. Plug in the power supply and turn on the lights. Check to make sure they're working properly and that all the colors are showing if you're using RGB lights. If there are any problems, now is the time to fix them.
Step 6: Seal the Light Assembly
Once you're satisfied that the lights are working, apply another layer of waterproof silicone sealant around the edges of the light fixture. This will prevent water from seeping in and causing any electrical issues. Let the sealant dry completely according to the manufacturer's instructions.
Tips and Tricks
- Always follow the manufacturer's instructions that come with your LED lights. Every product is a little different, and they'll have specific guidelines for installation.
- If you're installing multiple lights, make sure you wire them correctly in series or parallel depending on the design of your pool's electrical system.
- Consider getting a timer or a remote control for your LED lights. This makes it really easy to turn the lights on and off at different times and adjust the colors from the comfort of your lounge chair.
- If you live in an area with cold winters, make sure your lights are rated for cold weather. Some LED lights can be damaged by freezing temperatures.
Maintenance
Maintaining your pool LED lights is pretty simple. Every once in a while, check the lights for any signs of damage or leaks. If you notice any water inside the light housing, it's important to fix it right away to prevent electrical problems. You can also clean the lights with a soft cloth and some mild soap to keep them looking shiny.
Conclusion
Installing LED lights in your fiberglass pool is a great way to enhance its beauty and functionality. As a Swimming Pool LED supplier, I highly recommend 6500k swimming pool led for a bright, natural - looking light. If you're interested in purchasing high - quality pool LED lights, feel free to reach out to us for more information and to discuss your specific needs. We're here to help you make your pool the envy of the neighborhood.
References
- Pool Lighting Installation Manuals from Various Manufacturers
- Fiberglass Pool Maintenance Guides